本文目的在于为我们在日常的 Unity 开发过程中标准化构建游戏的发行版本。文章撰写于 2023.2 截至 2024.10 依旧有效,其中涉及到的软件版本均可使用 2024 最新版。
# Software Environment 本文所需的系统平台及软件环境
- Windows
- Docker
- Unity
- Wwise (Optional) 可选
- Linux
- 不推荐在 Linux 平台使用 Unity 和 TeamCityAgent
- Linux 平台不支持 Wwise
- 即使有一些编辑器脚本可以让 Wwise 代码在 Linux 平台正常编译,依然不推荐 Linux 平台作为 TeamCityAgent
- MacOS
- 未测试
# 安装 Docker
# 官网
# 验证
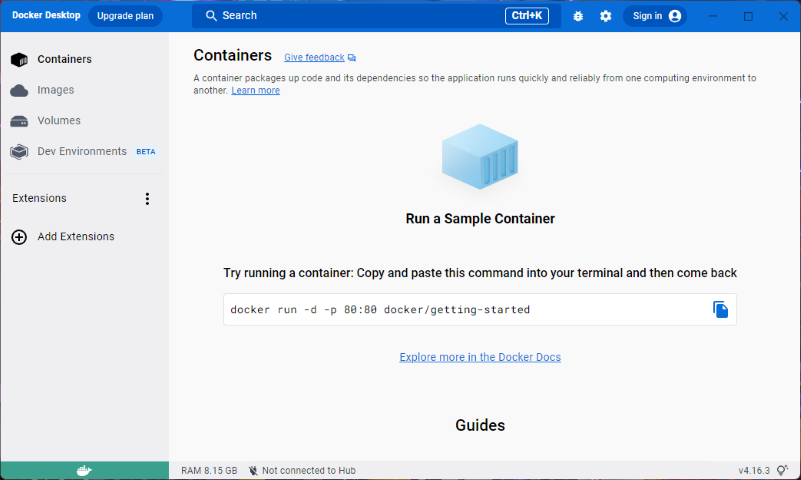
安装完成后,打开 docker-desktop,我们会看到 docker 的界面
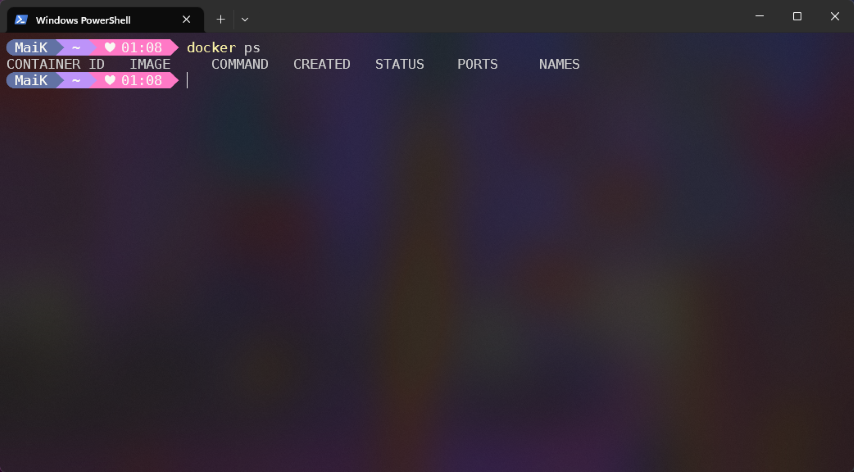
在命令行输入以下命令 (Linux 平台需要加 sudo)
$ docker ps |
命令行会显示类似下图打印
# 创建 Docker 内部网络
此处创建 docker 内部的虚拟网络,目的是可以为每个容器分配一个固定的 ip,如果我们的设备在远程,可以方便的使用 Nginx Proxy Manager 反向代理到固定域名。
在命令行输入以下命令 (Linux 平台需要加 sudo)
$ docker network create docker_net --subnet=172.20.0.0/16 |
其中 docker_net 是 docker 内部新建网络的名字,可根据实际情况修改。
# 安装与配置 Portainer
# 安装 Portainer-CE
Portainer 是一款图形化的 docker 管理工具,可以比较方便的管理和调整 docker
在命令行输入命令安装 portainer-ce 注意此命令在命令行的一行中输入 (Linux 平台需要加 sudo)
$ docker run -d -p 8000:8000 -p 9000:9000 -p 9443:9443 --name portainer --network docker_net --ip 172.20.0.2 --restart=always -v /var/run/docker.sock:/var/run/docker.sock portainer/portainer-ce:linux-amd64-2.17.0 |
命令中网络端口,portainer-ce 包的版本,ip,挂载路径可根据实际情况修改。此处 docker_net 是上文中创建出的 docker 内部网络
# 安装 Portainer Agent
新版的 portainer 可能需要 portainer agent 才可正常添加内部环境
在命令行输入命令安装 portainer agent 注意此命令在命令行的一行中输入 (Linux 平台需要加 sudo)
$ docker run -d -p 9001:9001 --name portainer_agent --network docker_net --ip 172.20.0.3 --restart=always -v /var/run/docker.sock:/var/run/docker.sock -v /var/lib/docker/volumes:/var/lib/docker/volumes portainer/agent:2.17.0 |
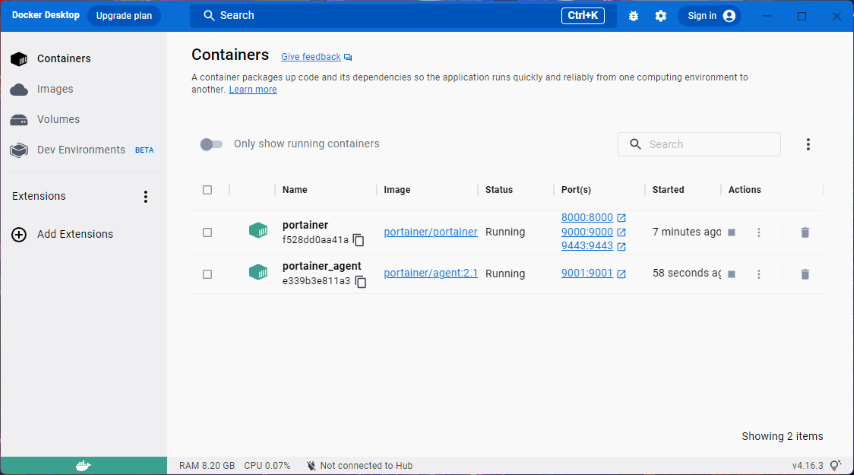
命令行安装完成后,可以在 docker-desktop 中查看运行状态
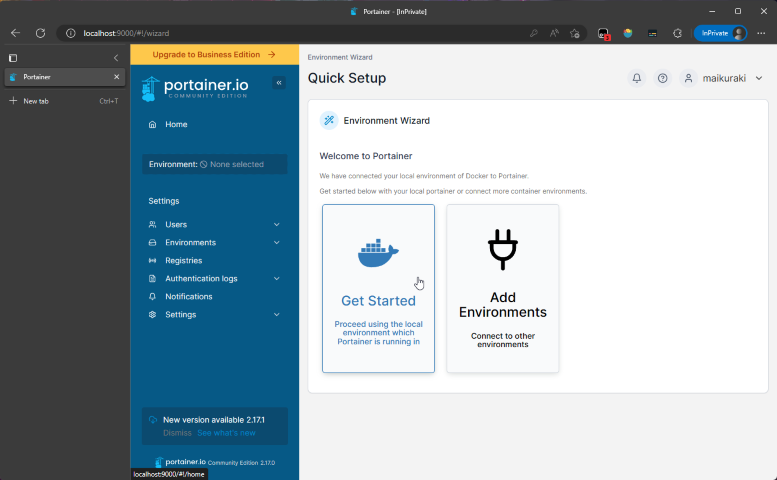
# 在浏览器中配置 Portainer
在浏览器中输入 localhost:9000 访问 portainer 管理界面 (9000 端口是上文中 portainer-ce 的对外端口)
点击 Get Started
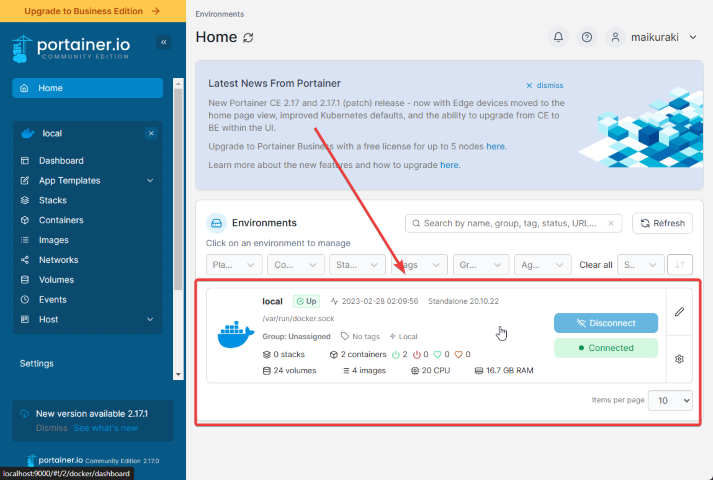
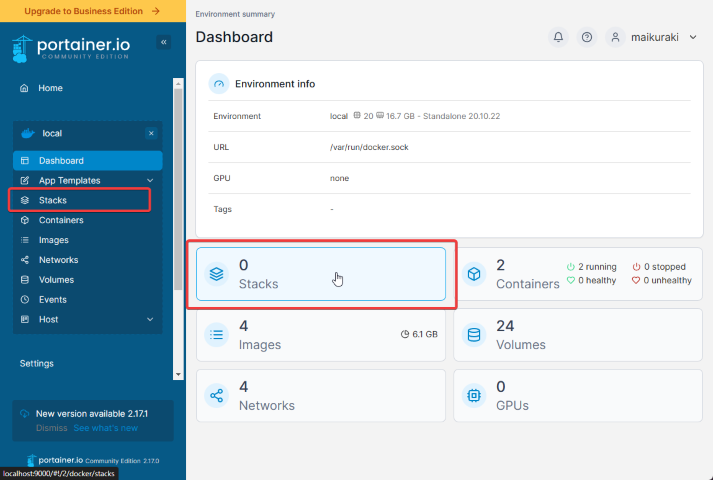
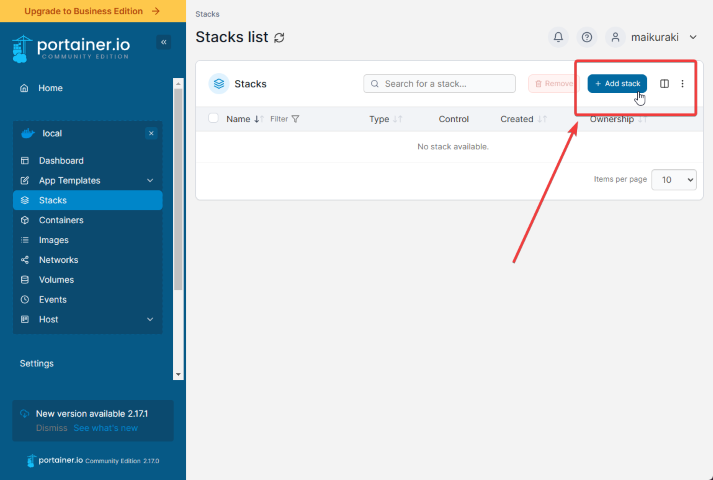
点击 Environments -> Stacks -> Add Stack 创建容器配置
# 安装与配置 Gitlab-CE
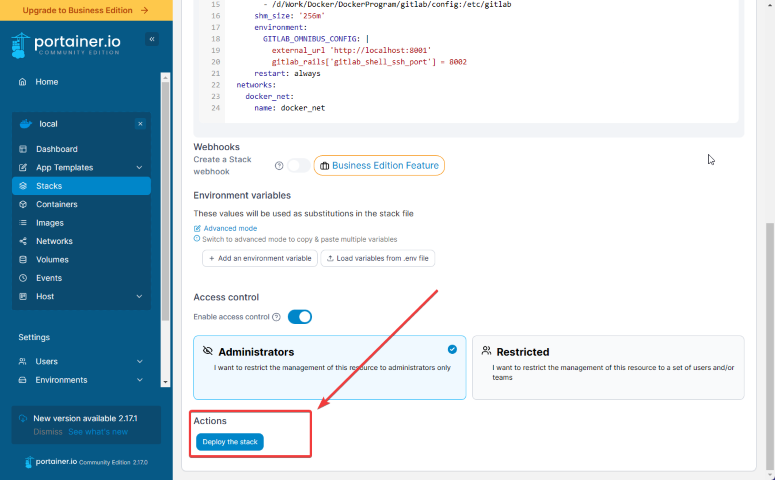
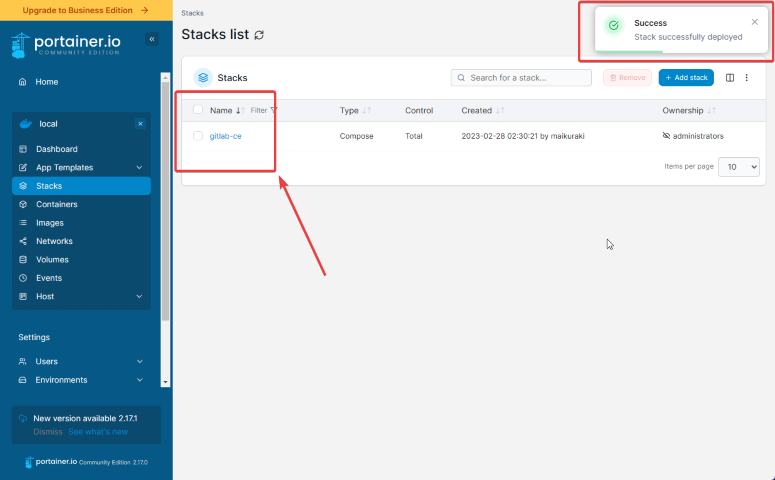
# 在 Portainer 中安装 gitlab-ce
使用 docker-compose 在 Portainer 中安装 gitlab-ce
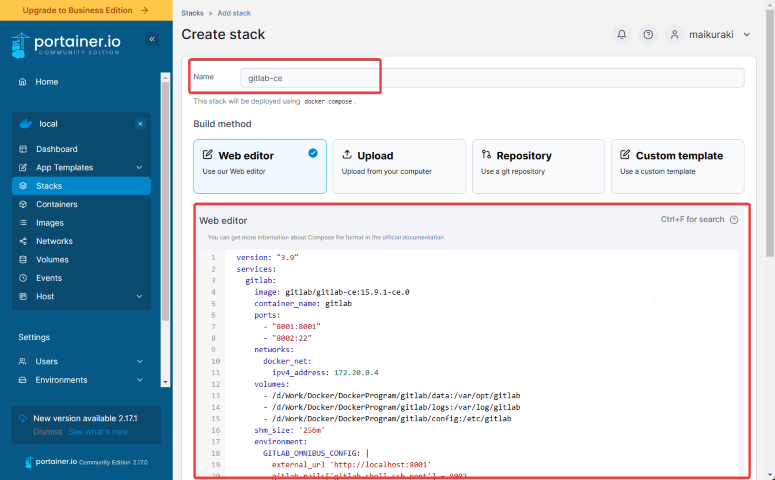
以下是 docker-compose yaml 内容
version: "3.9" | |
services: | |
gitlab: | |
image: gitlab/gitlab-ce:15.9.1-ce.0 | |
container_name: gitlab | |
ports: | |
- "8001:8001" | |
- "8002:22" | |
networks: | |
docker_net: ## 此处 docker_net 对应上文中创建的网络名称 | |
ipv4_address: 172.20.0.4 | |
volumes: | |
- /d/Work/Docker/DockerProgram/gitlab/data:/var/opt/gitlab ## 此挂载路径在 Windows 中对应 D:\Work\Docker\DockerProgram\gitlab | |
- /d/Work/Docker/DockerProgram/gitlab/logs:/var/log/gitlab | |
- /d/Work/Docker/DockerProgram/gitlab/config:/etc/gitlab | |
shm_size: '256m' | |
environment: | |
GITLAB_OMNIBUS_CONFIG: | | |
external_url 'http://localhost:8001' | |
gitlab_rails['gitlab_shell_ssh_port'] = 8002 | |
restart: always | |
networks: | |
docker_net: ## 此处 docker_net 对应上文中创建的网络名称 | |
name: docker_net |
# 配置使用 Gitlab
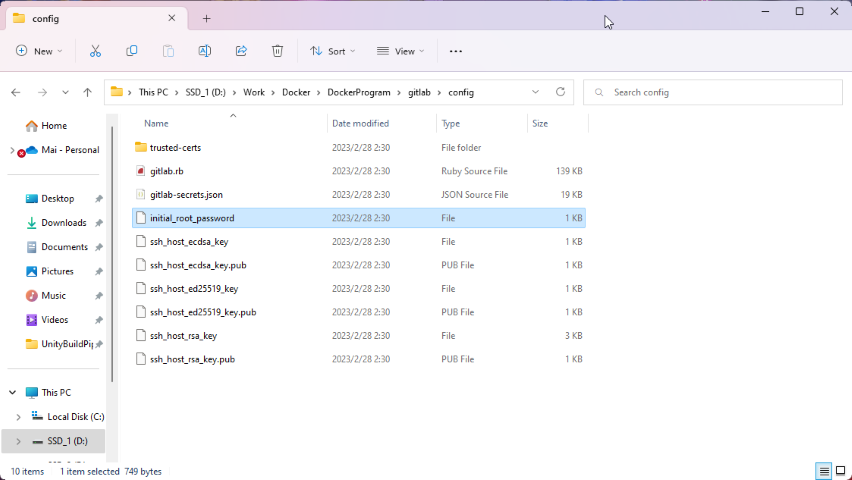
在 gitlab 创建完成后,找到 gitlab 配置文件,查看 root 密码。上文中 yaml 中挂载了路径 /d/Work/Docker/DockerProgram/gitlab/config
对应 Windows 磁盘中 D:\Work\Docker\DockerProgram\gitlab\config , 访问路径找到文件 initial_root_password 以文本形式打开后找到 gitlab 初始 root 密码
在浏览器中输入 localhost:8001 (8001 端口是上文中 gitlab 的对外端口) 访问 gitlab 主页,请使用账号 root 与 initial_root_password 文件中查到的密码进行首次登录。请自行创建私有账号和新的空项目
# 创建和上传游戏项目
在本地创建游戏项目并上传至 gitlab
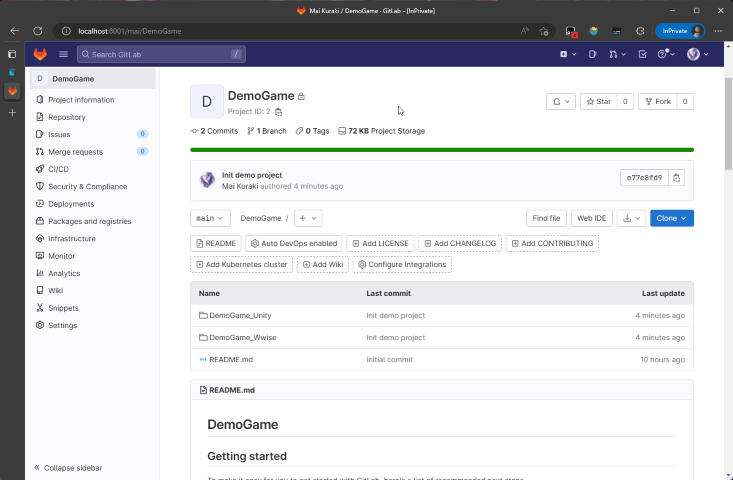
项目结构
<root>
    ├─DemoGame_Unity
    |       ├─Assets
    |       |   ├─Editor
    |       |   |   └─BuildScript.cs
    |       |   ├─Scene
    |       |   |   └─SampleScene.unity
    |       |   └─...
    |       └─...
    ├─DemoGame_Wwise
    |       └─...
    └─README.md
BuildScript.cs 必须存放在 Unity 项目 Assets/Editor 路径下,目的是可以在 TeamCity 里拿到它
using System.Collections.Generic; | |
using System.IO; | |
using UnityEditor; | |
using UnityEditor.Build.Reporting; | |
using UnityEngine; | |
namespace DemoGame.Editor | |
{ | |
public class BuildScript : MonoBehaviour | |
{ | |
private const string DEBUG_FLAG = "[Game Builder]"; | |
private const string INVALID_FLAG = "INVALID"; | |
private const string ApplicationName = "DemoGame"; | |
private const string OutputBasePath = "Build"; | |
private const string OutputPath_Android = "Android"; | |
private const string OutputPath_Windows = "Windows"; | |
[MenuItem("Build/Build Android APK (IL2CPP)")] | |
public static void PerformBuild_AndroidAPK() | |
{ | |
EditorUserBuildSettings.exportAsGoogleAndroidProject = false; | |
PerformBuild(BuildTarget.Android, BuildTargetGroup.Android, | |
ScriptingImplementation.IL2CPP, $"{OutputPath_Android}/{ApplicationName}.apk", bCleanBuild: true, | |
bOutputIsFolderTarget: false); | |
} | |
[MenuItem("Build/Build Windows (IL2CPP)")] | |
public static void PerformBuild_Windows() | |
{ | |
PerformBuild(BuildTarget.StandaloneWindows64, BuildTargetGroup.Standalone, | |
ScriptingImplementation.IL2CPP, $"{OutputPath_Windows}/{ApplicationName}.exe", bCleanBuild: true, | |
bOutputIsFolderTarget: false); | |
} | |
[MenuItem("Build/Export Android Project (IL2CPP)")] | |
public static void PerformBuild_AndroidProject() | |
{ | |
EditorUserBuildSettings.exportAsGoogleAndroidProject = true; | |
PerformBuild(BuildTarget.Android, BuildTargetGroup.Android, | |
ScriptingImplementation.IL2CPP, $"{OutputPath_Android}/{ApplicationName}", bCleanBuild: true, | |
bOutputIsFolderTarget: true); | |
} | |
public static void PerformBuild(BuildTarget TargetPlatform, BuildTargetGroup TargetGroup, | |
ScriptingImplementation BackendScriptImpl, string OutputTarget, bool bCleanBuild = true, | |
bool bOutputIsFolderTarget = true) | |
{ | |
if (bCleanBuild) | |
{ | |
DeletePlatformBuildFolder(TargetPlatform); | |
} | |
var buildPlayerOptions = new BuildPlayerOptions(); | |
buildPlayerOptions.scenes = GetBuildSceneList(); | |
buildPlayerOptions.locationPathName = GetOutputTarget(TargetPlatform, OutputTarget, bOutputIsFolderTarget); | |
buildPlayerOptions.target = TargetPlatform; | |
buildPlayerOptions.options = BuildOptions.CleanBuildCache; | |
PlayerSettings.SetScriptingBackend(TargetGroup, BackendScriptImpl); | |
var report = BuildPipeline.BuildPlayer(buildPlayerOptions); | |
var summary = report.summary; | |
if (summary.result == BuildResult.Succeeded) | |
Debug.Log($"{DEBUG_FLAG} Build succeed, size: {summary.totalSize} bytes"); | |
if (summary.result == BuildResult.Failed) Debug.Log($"{DEBUG_FLAG} Build failed"); | |
} | |
private static string GetPlatformOutputFolder(BuildTarget TargetPlatform) | |
{ | |
switch (TargetPlatform) | |
{ | |
case BuildTarget.Android: | |
return $"{OutputBasePath}/{OutputPath_Android}"; | |
case BuildTarget.StandaloneWindows64: | |
return $"{OutputBasePath}/{OutputPath_Windows}"; | |
} | |
return INVALID_FLAG; | |
} | |
private static void DeletePlatformBuildFolder(BuildTarget TargetPlatform) | |
{ | |
string platformOutputPath = GetPlatformOutputFolder(TargetPlatform); | |
string platformOutputFullPath = | |
platformOutputPath != INVALID_FLAG ? Path.GetFullPath(platformOutputPath) : INVALID_FLAG; | |
if (Directory.Exists(platformOutputFullPath)) Directory.Delete(platformOutputFullPath, true); | |
} | |
private static string GetOutputTarget(BuildTarget TargetPlatform, string TargetPath, | |
bool bTargetIsFolder = true) | |
{ | |
string PlatformOutFolder = GetPlatformOutputFolder(TargetPlatform); | |
string resultPath = Path.Combine(OutputBasePath, TargetPath); | |
Debug.Log( | |
$"{DEBUG_FLAG} result path: {resultPath}, platformFolder: {PlatformOutFolder}, platform fullPath:{Path.GetFullPath(PlatformOutFolder)}"); | |
if (!Directory.Exists(Path.GetFullPath(PlatformOutFolder))) Directory.CreateDirectory(PlatformOutFolder); | |
#if UNITY_IOS | |
if (!Directory.Exists($"{resultPath}/Unity-iPhone/Images.xcassets/LaunchImage.launchimage")) | |
{ | |
Directory.CreateDirectory($"{resultPath}/Unity-iPhone/Images.xcassets/LaunchImage.launchimage"); | |
} | |
#endif | |
return resultPath; | |
} | |
private static string[] GetBuildSceneList() | |
{ | |
List<string> sceneList = new List<string>() | |
{ | |
"Assets/Scene/SampleScene.unity" | |
}; | |
return sceneList.ToArray(); | |
} | |
[MenuItem("Build/Print Debug Info", priority = 100)] | |
public static void PrintDebugInfo() | |
{ | |
foreach (var scene_name in GetBuildSceneList()) | |
{ | |
Debug.Log($"{DEBUG_FLAG} Pre Build Scene: {scene_name}"); | |
} | |
} | |
} | |
} |
# 安装与配置 TeamCity Server
# 在 Portainer 中安装 teamcity-server
以下是 yaml 内容
--- | |
version: "3" | |
services: | |
teamcity-server: | |
image: jetbrains/teamcity-server:2022.10.2 | |
container_name: teamcity-server | |
volumes: | |
# these two folder must be valid and approved, maybe use chown -R 1000:1000 | |
- /d/Work/Docker/DockerProgram/teamcity_server/datadir:/data/teamcity_server/datadir | |
- /d/Work/Docker/DockerProgram/teamcity_server/logs:/opt/teamcity/logs | |
ports: | |
- 8003:8111 | |
networks: | |
docker_net: | |
ipv4_address: 172.20.0.5 | |
restart: unless-stopped | |
# teamcity-agent: | |
# image: jetbrains/teamcity-agent:2022.10.2 | |
# container_name: teamcity-agent | |
# volumes: | |
# # these two folder must be valid and approved, maybe use chown -R 1000:1000 | |
# - /mnt/HDD/docker_program/teamcity_agent/config:/data/teamcity_agent/conf | |
# # environment: | |
# # this is device real ip not docker inner ip | |
# # SERVER_URL: '192.168.50.11:8003' | |
networks: | |
docker_net: | |
name: docker_net |
不推荐在 docker 中安装 teamcity-agent。
安装后可以看到 teamcity-server 在正常运行
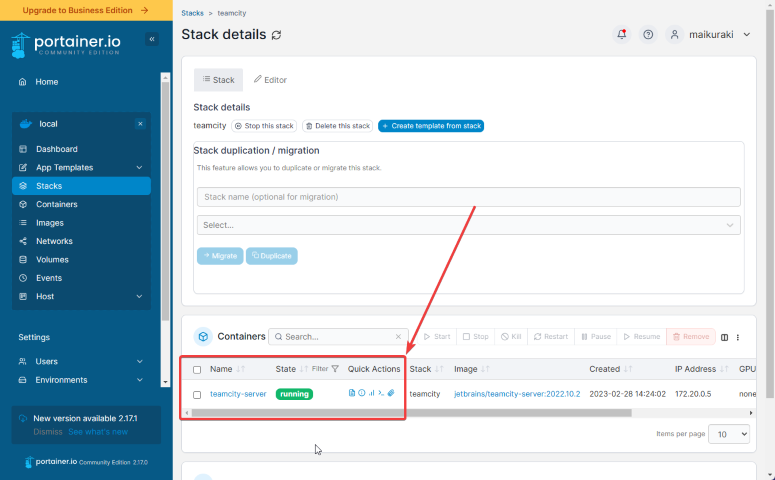
通过浏览器访问 localhost:8003 进入 teamcity-server 的管理页面,初始化创建账号后进入 teamcity
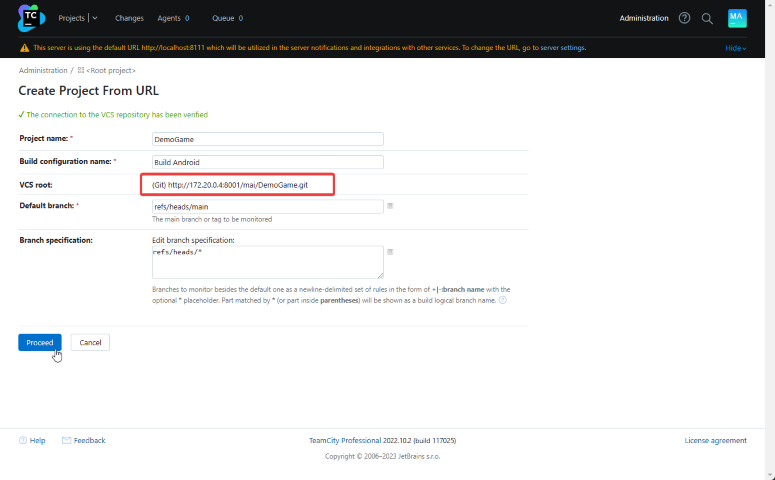
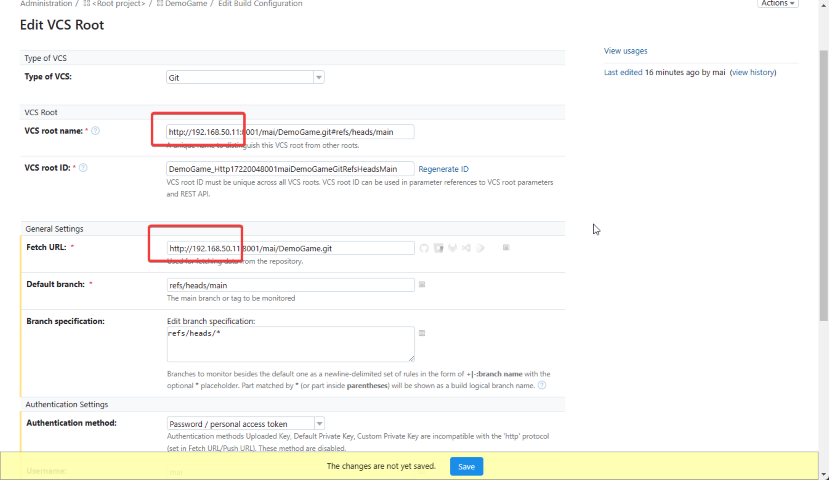
# 创建 teamcity 项目

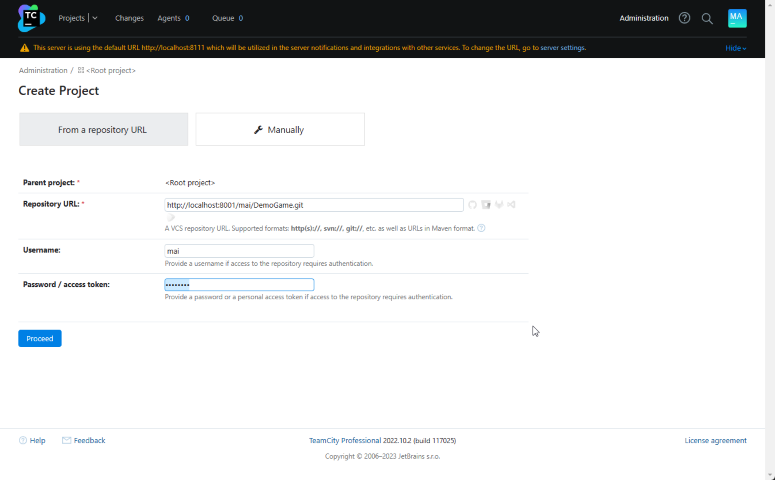
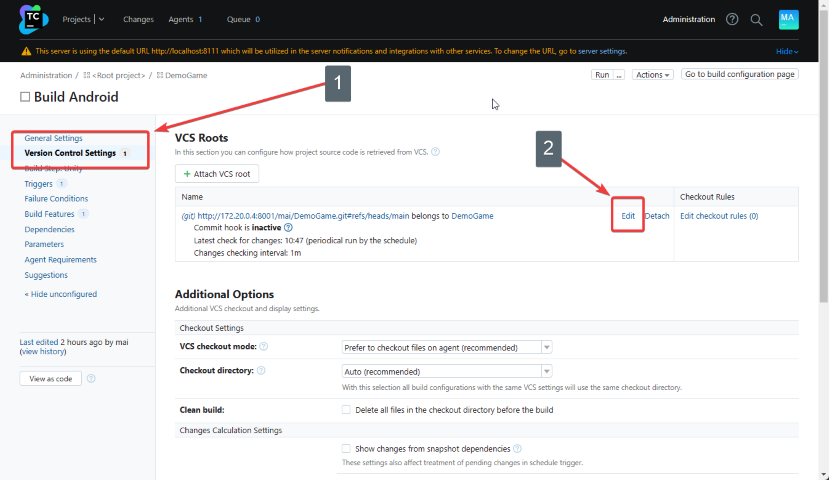
此处的 http://localhost:8001/YOUR_USER_NAME/YOUR_PROJECT_NAME.git 地址如果是以 localhost 作为地址,那么在 docker 容器中的 teamcity-server 拿到的 localhost 是 docker 内部的 ip 地址,需要根据你的实际情况替换成你的版本设备 ip,如果需要在同一个设备中使用 teamcity-server 与 gitlab 服务,请将 localhost 替换为 docker 内部 ip,比如 http://172.20.0.4:8001/mai/DemoGame.git
# 为 teamcity-server 配置 Unity build plugin
-
我们可以访问 github 或者 teamcity 官网下载
-
下载后得到
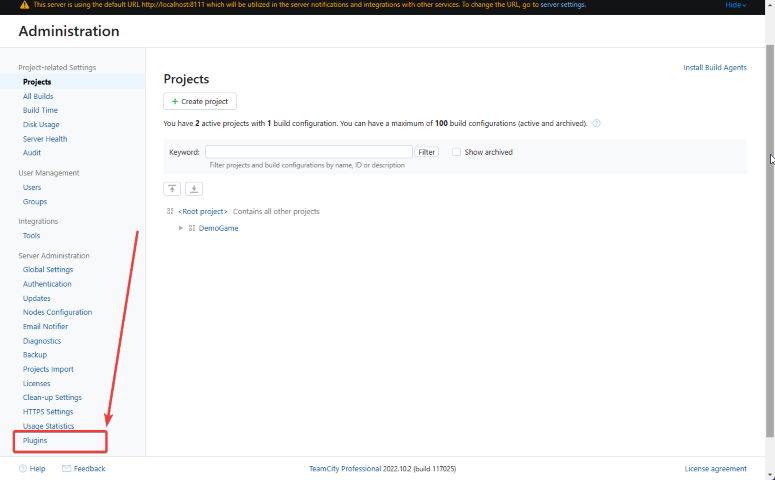
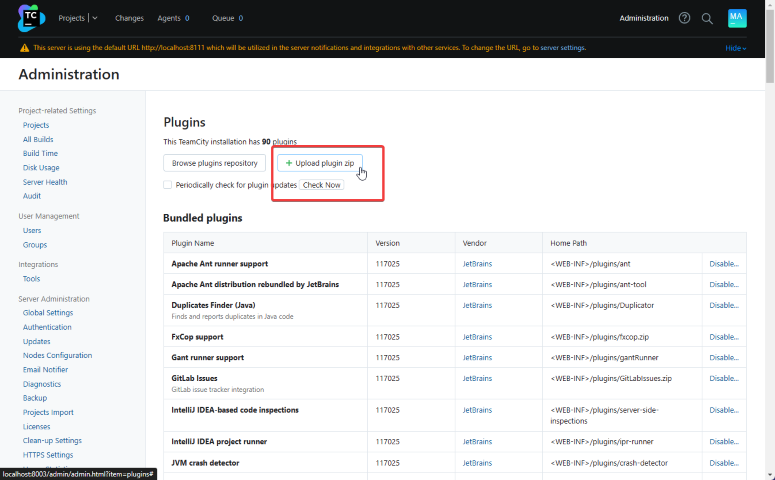
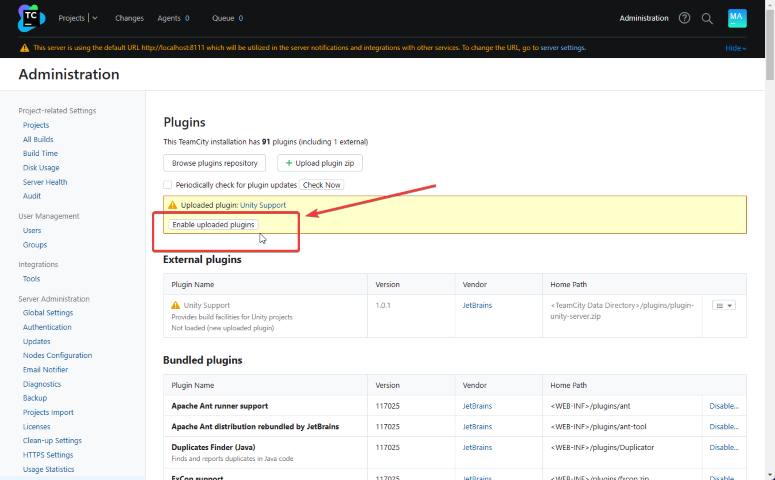
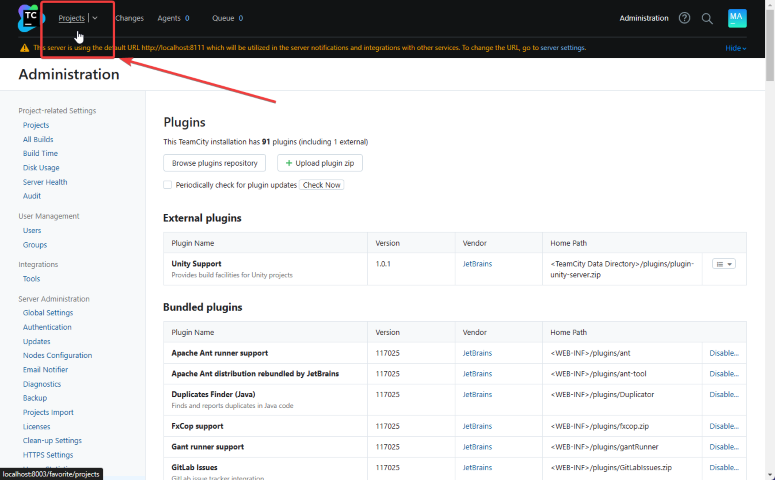
plugin-unity-server.zip,点击[Administration]->[Plugins]->[Upload plugin zip]->[Enable uploaded plugins]安装并启用 teamcity-server 的 Unity Build 插件
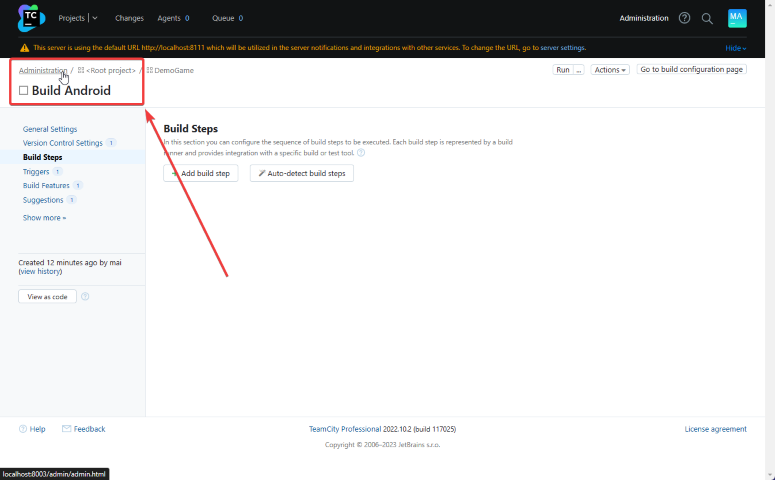
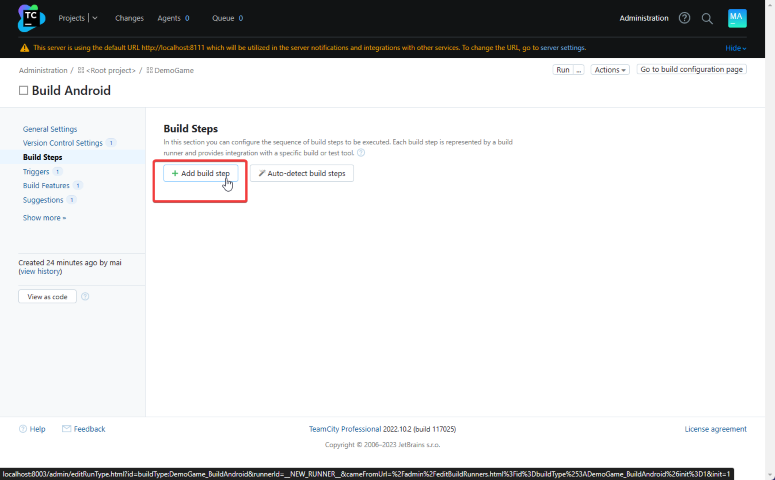
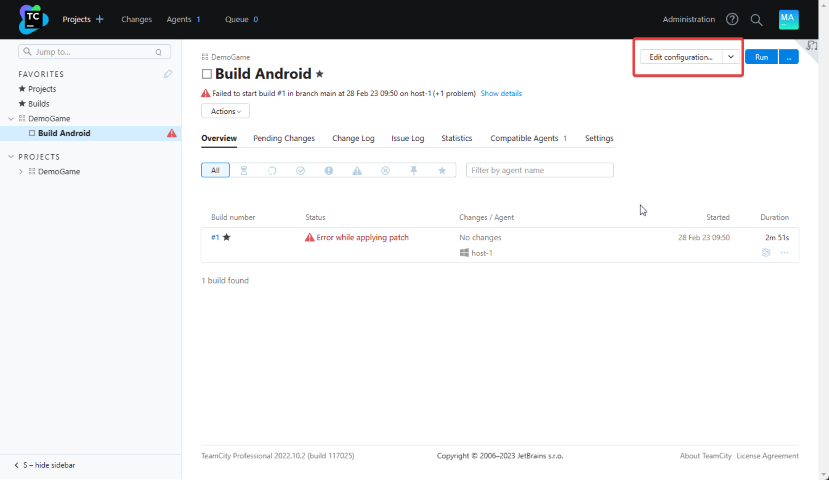
- 安装好插件后,点击
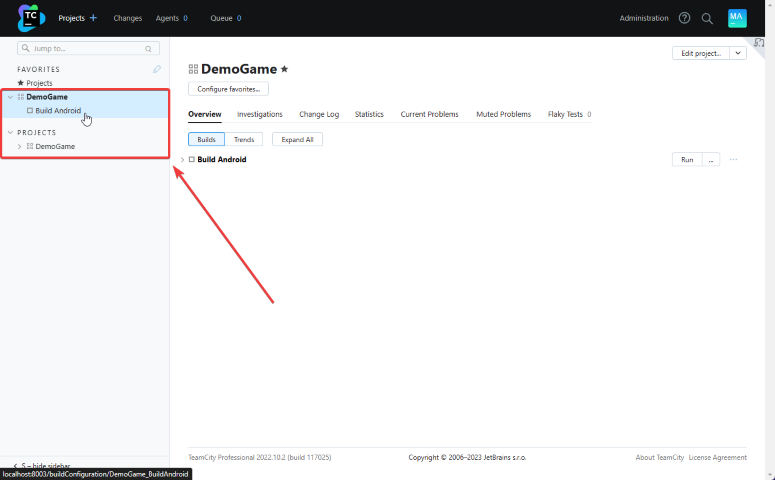
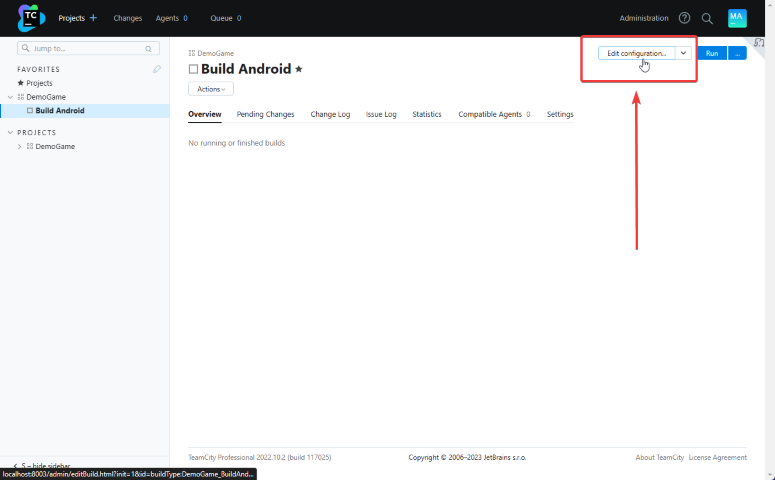
[Projects]->[Build Android]->[Edit configuration]->[Build Steps]来编辑 BuildStep
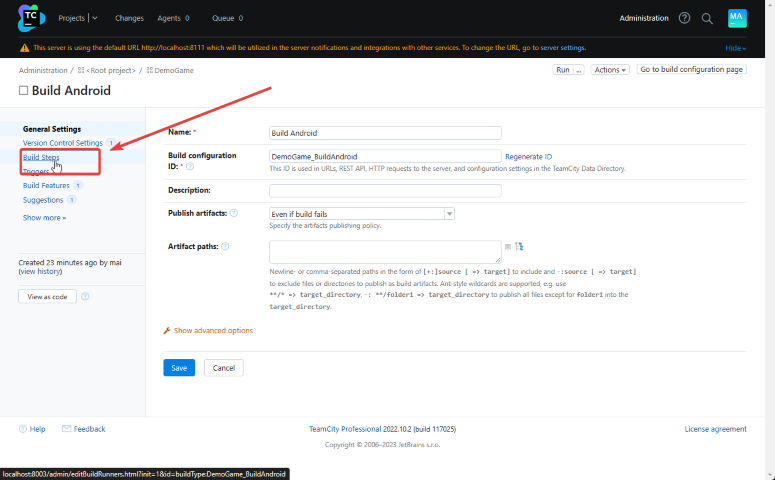
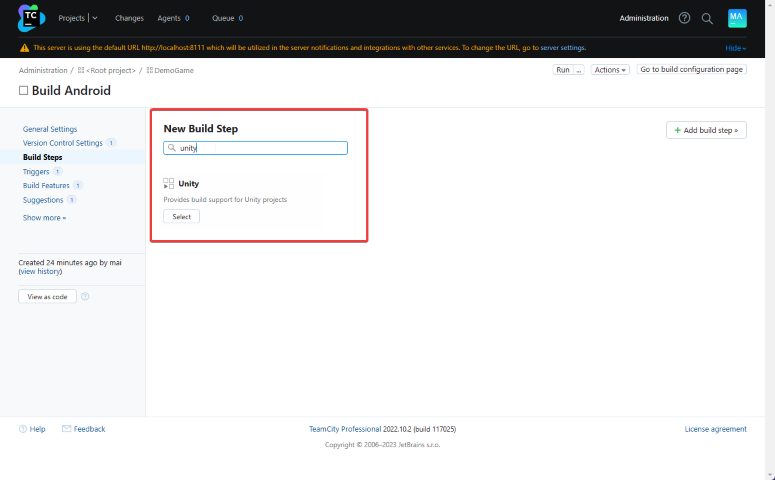
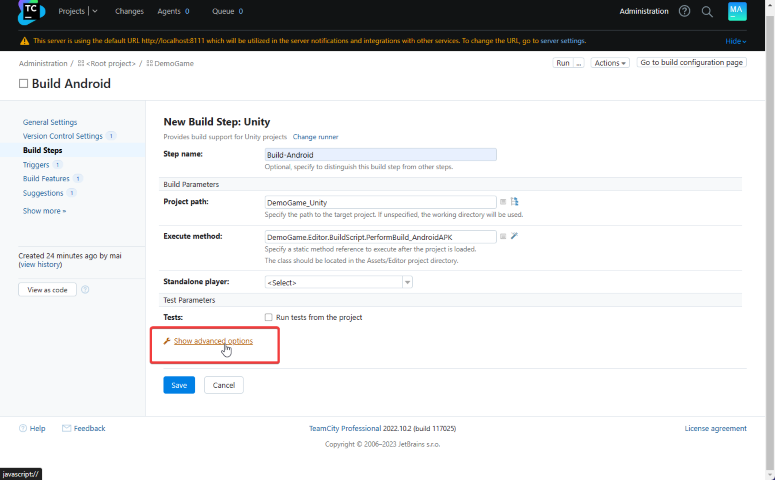
- 点击
[Add build step]搜索unity进入配置
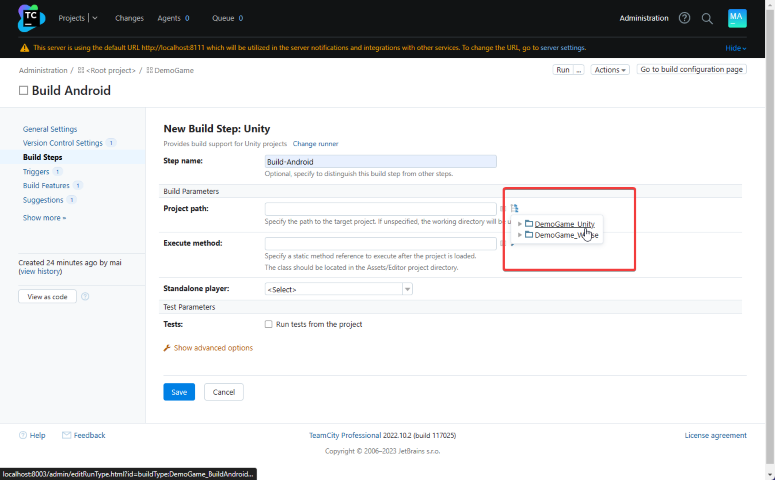
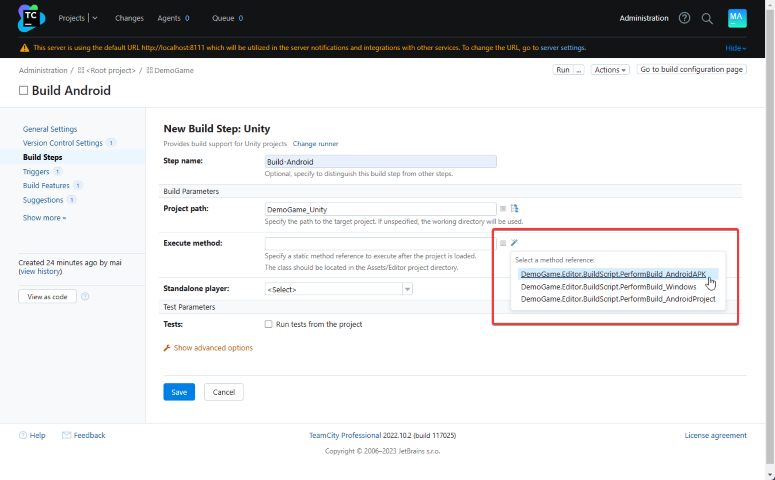
- 选择 Project Path 与
BuildScript.cs中的打包方法
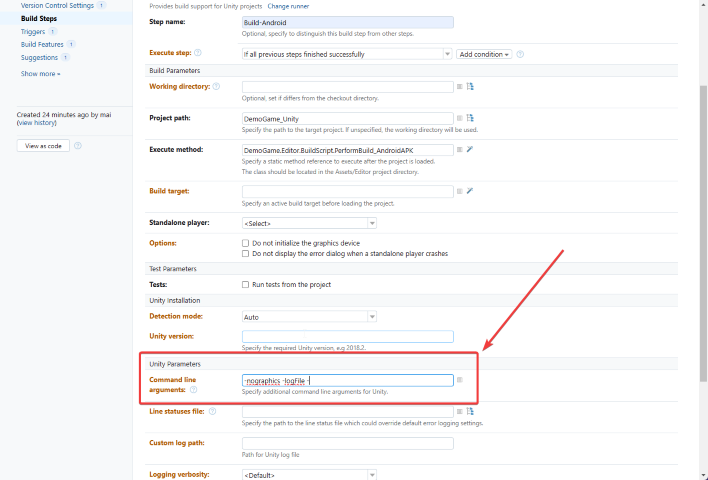
- 添加命令行参数
$ -nographics -logFile - |
- 回到 General Settings 配置打包输出路径
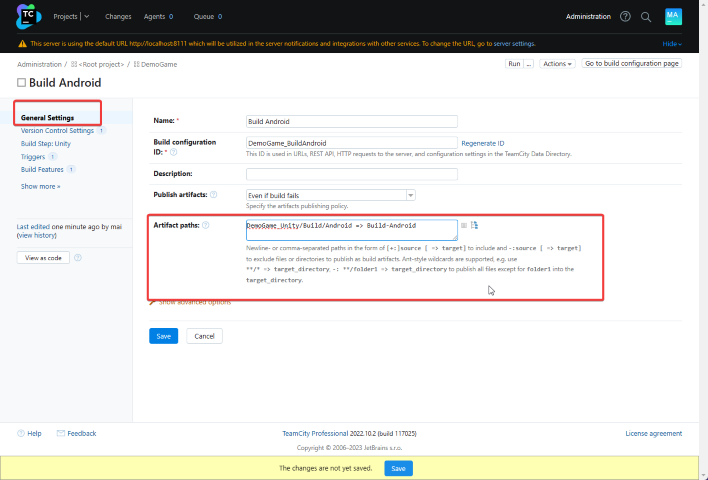
$ DemoGame_Unity/Build/Android => Build-Android |
此处 DemoGame_Unity/Build/Android 输出路径可以在 Unity 项目的 BuildScript.cs 中更改
# 安装与配置 TeamCity Agent
TeamCity Agent 是实际用来控制打包机器的程序,它会直接调设备中的 Unity 程序来进行项目打包。
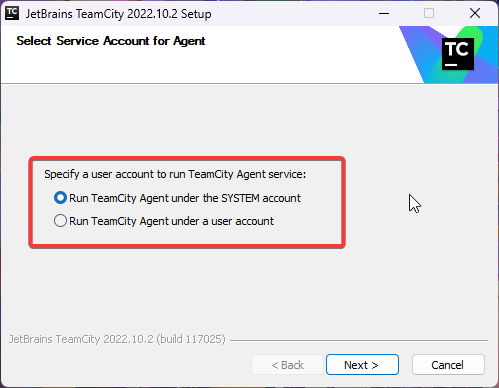
# 安装 TeamCity Windows
安装完成后自动配置时,建议使用系统账号,windows 的 user 账号可能会有权限不足的报错
假如安装路径是 D:\Software\TeamCity
修改 D:\Software\TeamCity\buildAgent\conf 路径下文件 buildAgent.dist.properties 大约第 9 行改为 serverUrl=http://localhost:8003/ ,并且在文件底部添加两行配置
unity.path=D:\Software\Unity\Editor | |
env.UNITY_HINT_PATH=D:\Software\Unity\Editor |
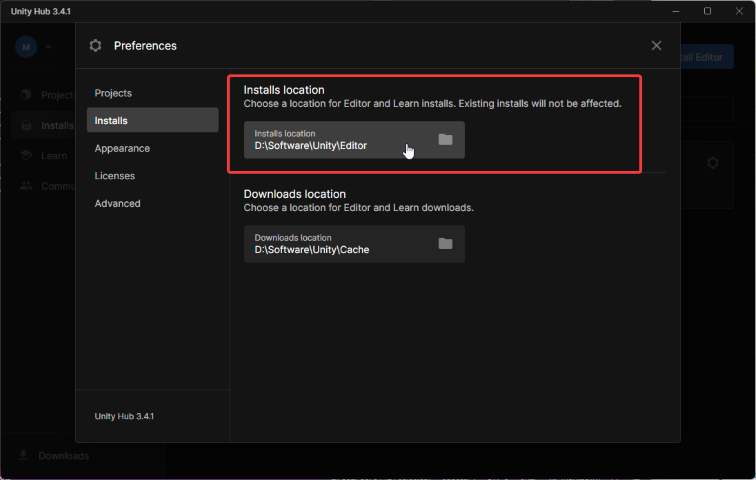
注意 D:\Software\Unity\Editor 是 UnityHub 中设置的 Unity Editor 安装路径
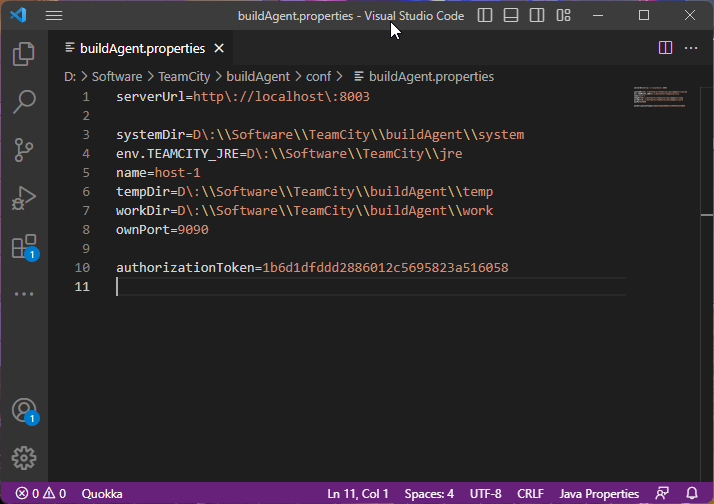
修改 D:\Software\TeamCity\buildAgent\conf 路径下文件 buildAgent.properties 内容,大约第 1 行改为 serverUrl=http\://localhost\:8003
serverUrl=http\://localhost\:8003 |
如果 buildAgent.properties 文件内容类似下图,那么配置文件应该是没有问题了
# 启动 TeamCity Agent
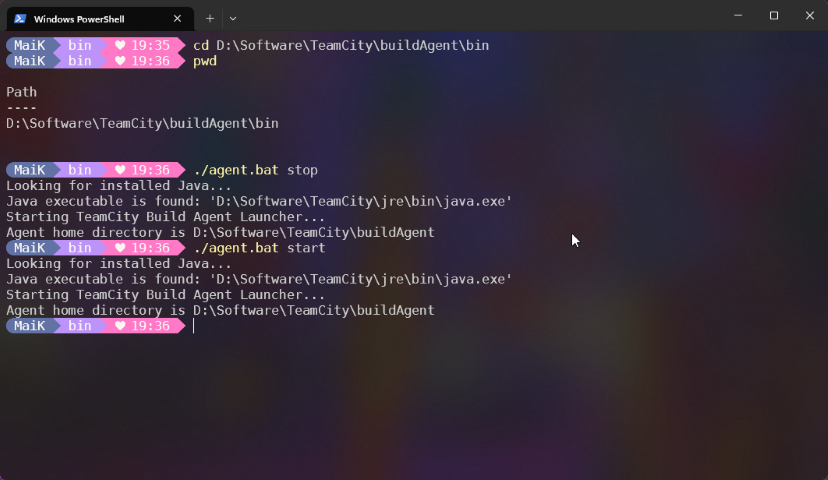
用命令行进入 D:\Software\TeamCity\buildAgent\bin

输入命令 ./agent.bat start 启动 TeamCity Agent
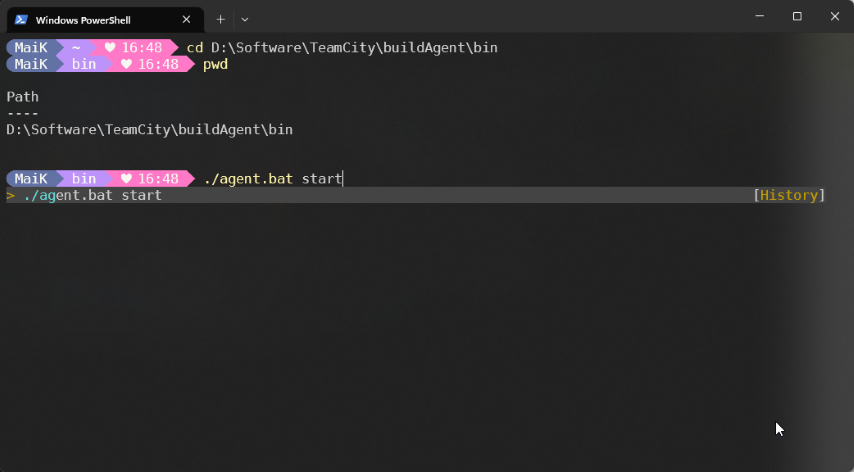
$ ./agent.bat start |
# 在 TeamCity Server 中完成项目配置
# 注册并启用 Agent
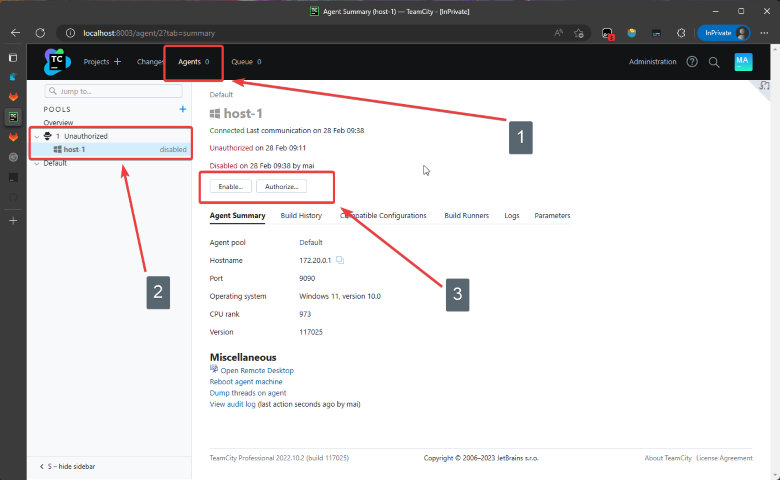
浏览器访问 http://localhost:8003 访问 [Agents] -> [Unauthorized] 在右侧分别点击 [Authorize] 与 [Enable] 来注册和启动打包机
# 开始打包
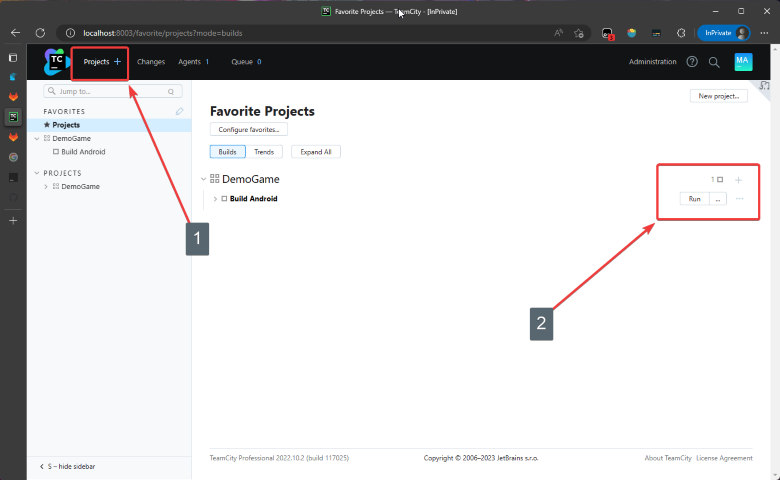
回到 [Project] 点击 [Run] 开始打包
# Issues
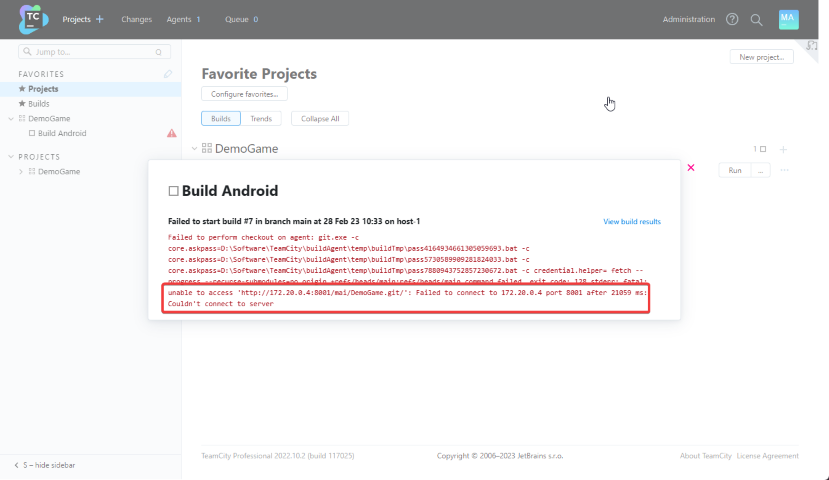
# 连接 git 失败
如果我们完全按照上文创建 gitlab 与 teamcity-server,在 windows 端的 docker 中同时运行 teamcity-server 和 gitlab 会出现找不到打包地址的问题
目前尚未知原因,我的解决办法是在本地局域网内另一台设备部署了 gitlab 服务,将 teamcity-server 中的地址替换为局域网内另一台机器的真实 ip,然后再次打包即可成功。还可以在安装 teamcity-agent 的时候同时选择安装 windows 版的 teamcity-server,应该也可以解决同机器无法访问 git 的问题。
# 找不到 unity
Failed to start build runner 'unity'
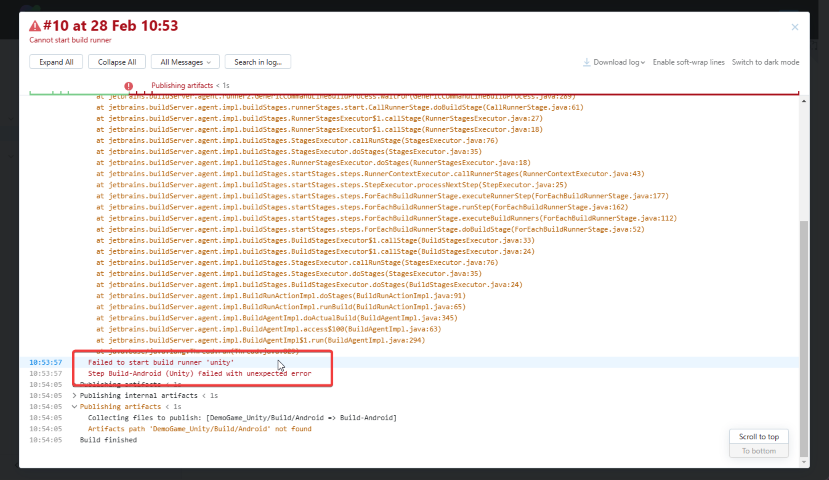
遇到这个问题请用命令行进入 D:\Software\TeamCity\buildAgent\bin
重新输入 ./agent.bat stop ./agent.bat start 这两条命令解决,它会重启并应用配置文件中的 unity 路径配置。
$ ./agent.bat stop | |
$ ./agent.bat start |